

Honeywell TH5220D1029 Thermostat: Installation and User Guide
Accessing the TH5220D1029 installation manual in PDF format provides detailed guidance for proper setup, troubleshooting, and understanding of product specifications․
Downloadable resources, including user guides and manuals, are readily available online for free viewing or download, ensuring a smooth installation process․
The Honeywell TH5220D1029 is a programmable thermostat designed for efficient home climate control․ Access to the comprehensive installation manual, conveniently available as a PDF download, is crucial for both professional installers and DIY enthusiasts․ This manual details the thermostat’s features, specifications, and provides step-by-step instructions for a successful installation․
Understanding the TH5220D1029’s capabilities begins with familiarizing yourself with the documentation․ The PDF manual covers essential aspects, from wiring diagrams to configuration settings, ensuring compatibility with various HVAC systems․ It emphasizes the importance of a trained technician for installation, while also empowering informed users․ The manual’s availability online – as of dates ranging from June 2025 to February 2024 – highlights Honeywell’s commitment to user support and accessibility of information․
Proper installation, guided by the manual, maximizes the thermostat’s performance and longevity․
Safety Precautions
Prior to installing the Honeywell TH5220D1029 thermostat, carefully review the safety precautions detailed within the downloadable PDF installation manual․ The manual explicitly states that installation should ideally be performed by a trained and experienced technician to mitigate potential hazards․ Ignoring these instructions could lead to product damage or, more seriously, create a hazardous situation․
The manual emphasizes the importance of verifying the product’s suitability for your specific application․ This includes checking the system’s voltage and compatibility ratings, as outlined on page 17 of the manual․ Disconnect power to the HVAC system at the breaker box before commencing any wiring work․ Failure to do so presents a significant risk of electrical shock․

Always adhere to local electrical codes and regulations during installation․ The PDF manual serves as a vital resource for safe and compliant installation practices․
Package Contents
The Honeywell TH5220D1029 thermostat package, as detailed in the downloadable PDF manual, should contain the following components: the thermostat itself, a mounting base plate, mounting screws and anchors for secure wall attachment, and a comprehensive installation and user guide – which is also available as a separate PDF document for easy access․
Carefully unpack the contents and verify that all listed items are present before beginning the installation process․ The PDF manual highlights the importance of having all necessary components readily available to ensure a smooth and efficient setup․ If any items are missing or appear damaged, immediately contact Honeywell support using the contact information provided within the manual or on their official website․
Retain the packaging and manual for future reference or warranty claims․

Installation Process
The TH5220D1029 installation manual PDF emphasizes a trained technician for installation, detailing careful instruction adherence to prevent product damage or hazardous conditions․
Required Tools and Materials
Before commencing the installation of your Honeywell TH5220D1029 thermostat, consulting the detailed PDF manual is crucial for a comprehensive list․ While a specific tool list isn’t explicitly detailed in the snippets provided, the manual stresses professional installation, implying specialized tools are necessary․
Expect to require standard HVAC tools, potentially including screwdrivers (various types), wire strippers, pliers, and a level to ensure proper mounting․ A voltage tester is essential for safety, particularly when dealing with high-voltage wiring (if applicable, as noted in the broader outline)․
The manual’s emphasis on technician installation suggests familiarity with HVAC systems and appropriate safety equipment is paramount․ Materials will include appropriate wiring connectors, wire labels for identification, and potentially mounting hardware if not included in the package․ Always prioritize safety and refer to the complete TH5220D1029 manual PDF for a definitive list․
Wiring Diagram Overview
The TH5220D1029 installation manual PDF contains critical wiring diagrams essential for correct installation․ These diagrams differentiate between low-voltage and, if applicable, high-voltage wiring configurations, demanding careful attention to detail․
The manual highlights the necessity of a trained, experienced technician for installation, indicating the wiring process isn’t straightforward․ Diagrams will illustrate terminal designations (e․g․, R, C, W, Y, G) and their corresponding functions within your HVAC system․
Understanding these designations is vital to avoid damaging the thermostat or the HVAC equipment․ The PDF will likely include multiple wiring scenarios to accommodate various system types․ Always meticulously follow the diagram specific to your setup, and prioritize safety by disconnecting power before commencing any wiring work․ Referencing the complete manual PDF is non-negotiable․
Connecting the Thermostat to the HVAC System
The TH5220D1029 installation manual PDF provides step-by-step instructions for connecting the thermostat to your heating, ventilation, and air conditioning (HVAC) system․ It clearly delineates procedures for both low-voltage and, where applicable, high-voltage connections․
The manual emphasizes the critical importance of a qualified technician for this process, as incorrect wiring can lead to system malfunction or hazardous conditions․ It details how to identify and connect wires to the appropriate terminals, referencing the wiring diagram for accurate placement․
The PDF will guide you through labeling wires before disconnection, ensuring a smooth reconnection process․ Strict adherence to the manual’s instructions is paramount for safe and effective operation․ Always verify power is off before handling any wiring, and consult the manual for specific system compatibility details․

Low Voltage Wiring
The TH5220D1029 installation manual PDF meticulously details low voltage wiring procedures․ It stresses the importance of identifying the existing wiring configuration before disconnecting anything from the old thermostat․ The manual provides a clear wiring diagram, illustrating the correct terminal connections for common HVAC systems․
Typically, low voltage wiring involves connections for Rh, Rc, W, Y, and G terminals, representing power, heat, cooling, and fan control respectively․ The PDF emphasizes the need for secure wire connections to prevent intermittent operation or system failures․
It also highlights the importance of using appropriate wire connectors and ensuring no bare wires are exposed․ The manual cautions against exceeding wire gauge recommendations and provides troubleshooting tips for common low voltage wiring issues․ Always double-check connections against the diagram before restoring power․
High Voltage Wiring (If Applicable)

The TH5220D1029 installation manual PDF explicitly states that high voltage wiring should only be performed by a trained, experienced technician․ It strongly cautions against attempting high voltage connections without proper qualifications, due to the inherent risk of electrical shock and fire hazard․
If your HVAC system utilizes high voltage (120V/240V) wiring, the manual provides detailed diagrams and instructions specifically for those configurations․ It emphasizes the absolute necessity of disconnecting power at the breaker box before commencing any wiring work․
The PDF outlines proper grounding procedures and the use of appropriate high voltage-rated wiring and connectors․ It stresses the importance of verifying all connections with a multimeter before restoring power․ The manual clearly states that Honeywell is not responsible for damage or injury resulting from improper high voltage wiring․
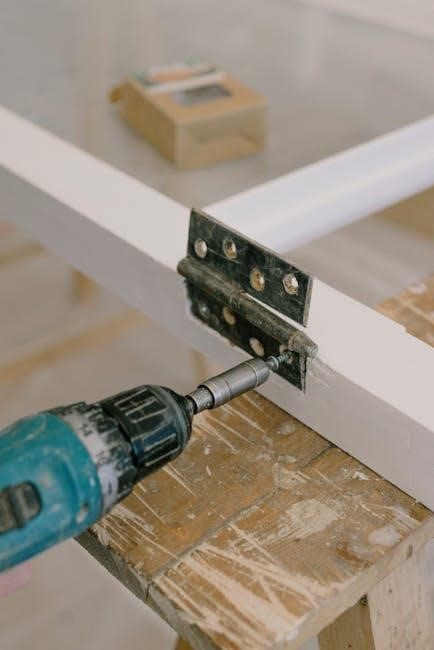
Mounting the Thermostat Base
The TH5220D1029 installation manual PDF provides clear instructions for securely mounting the thermostat base to the wall․ It begins by recommending selecting a location away from direct sunlight, drafts, and other temperature-influencing factors․ The manual details the necessary tools – typically a screwdriver, level, and potentially a drill – for a successful installation․
It illustrates how to mark and drill pilot holes, ensuring proper alignment with wall studs for added stability․ The PDF emphasizes using the provided screws and anchors to avoid damaging the thermostat or the wall․ Step-by-step diagrams demonstrate how to attach the base plate, ensuring it is level and firmly secured․
The manual also highlights the importance of routing wires neatly through the opening in the base before fully mounting it․ It cautions against pinching or damaging the wires during this process, ensuring a reliable connection․
Thermostat Configuration
The TH5220D1029 manual PDF guides users through powering on, initial setup, and customizing settings like date, time, and temperature schedules․
Detailed instructions ensure proper configuration for optimal performance and personalized comfort control․
Powering On and Initial Setup
Following the TH5220D1029 manual PDF, the initial power-up sequence is crucial for correct operation․ Ensure the thermostat base is securely mounted and wired according to the provided diagrams before applying power․ The display should illuminate, initiating a self-test and system check․
The manual details the initial setup prompts, guiding you through selecting the system type (heating, cooling, or heat pump) and configuring basic settings․ Pay close attention to the wiring configuration, as incorrect connections can prevent proper startup․ The PDF manual emphasizes verifying the correct voltage and polarity before proceeding․
During setup, the thermostat may request information about your HVAC system․ Refer to the manual for specific instructions on entering this data accurately․ Proper initial setup is vital for optimal performance and accurate temperature control․
Setting the Date and Time
The TH5220D1029 manual PDF clearly outlines the procedure for setting the correct date and time on your thermostat․ Accurate timekeeping is essential for proper scheduling and automated temperature control․ Access the settings menu using the thermostat’s buttons, as illustrated in the manual’s display and button functions section․
Navigate to the date and time settings, typically found within the system configuration options․ The manual provides step-by-step instructions for adjusting each value, ensuring accuracy․ Pay attention to the AM/PM designation when setting the time․
Confirm your selections and save the changes․ Incorrect date or time settings can disrupt programmed schedules and lead to inaccurate operation․ Refer to the manual’s troubleshooting section if you encounter difficulties during this process․
Programming the Temperature Schedule
The TH5220D1029 manual PDF details how to program a customized temperature schedule to optimize comfort and energy savings․ This feature allows you to set different temperatures for various times of the day and days of the week; Access the scheduling menu through the thermostat’s interface, guided by the manual’s illustrations․
The manual explains how to define temperature setpoints for ‘Wake,’ ‘Leave,’ ‘Return,’ and ‘Sleep’ periods․ You can create unique schedules for weekdays and weekends, catering to your specific lifestyle․ The PDF provides clear instructions on navigating these settings․
Save your programmed schedule to activate automated temperature control․ The manual also covers temporary and permanent hold options for overriding the schedule when needed, ensuring flexibility and convenience․
Weekday/Weekend Schedules
The TH5220D1029 manual PDF clearly outlines the process of creating separate temperature schedules for weekdays and weekends․ This allows for tailored comfort and energy efficiency based on differing routines․ The manual guides users through accessing the scheduling options within the thermostat’s menu system․
You can define up to four different periods per day – Wake, Leave, Return, and Sleep – with unique temperature settings for each․ The PDF provides step-by-step instructions on setting the start time and desired temperature for each period, both for weekdays and weekends․
The manual emphasizes the benefit of customizing these schedules to match your lifestyle, maximizing comfort when you’re home and saving energy while you’re away․ Detailed diagrams illustrate the menu navigation process․
Temporary Hold and Permanent Hold
The TH5220D1029 manual PDF details two hold functions: Temporary Hold and Permanent Hold, offering flexibility in temperature control․ A Temporary Hold overrides the programmed schedule for a specified duration, reverting back automatically once the time elapses․ The manual explains how to set the desired temperature and hold duration․
Conversely, a Permanent Hold completely disables the programmed schedule, maintaining the selected temperature indefinitely․ The PDF clarifies that activating a Permanent Hold requires manual reprogramming to resume the scheduled settings․ Step-by-step instructions, accompanied by screenshots, guide users through each process․

The manual stresses the importance of understanding the difference between these two options to avoid unintended temperature adjustments․ It also provides troubleshooting tips if the hold function isn’t operating as expected․
Understanding Thermostat Features
The TH5220D1029 manual PDF comprehensively explains display functions, button operations, fan control options, and system mode selections (Heat, Cool, Auto)․
Display and Button Functions
The Honeywell TH5220D1029 thermostat features a user-friendly display providing essential information at a glance․ The manual PDF details each icon and displayed value, including current temperature, setpoint, system mode, and fan status․ Understanding these indicators is crucial for effective operation․
Button functions are clearly outlined within the downloadable manual․ It explains the purpose of each button – typically including buttons for temperature adjustment, mode selection, fan control, and menu navigation․ The manual illustrates how to access and utilize advanced settings through the button interface․
Specific attention is given to navigating the thermostat’s menu system․ The PDF guide provides step-by-step instructions for accessing features like scheduling, settings adjustments, and troubleshooting options․ Familiarizing yourself with these functions, as described in the manual, ensures optimal control and customization of your home’s climate․
Fan Control Options
The Honeywell TH5220D1029 thermostat offers several fan control settings, detailed within the downloadable installation manual PDF․ These options allow users to customize airflow based on their comfort preferences and energy-saving goals․
Common fan settings include “Auto,” “On,” and potentially “Circulate․” The “Auto” setting operates the fan only during heating or cooling cycles․ “On” keeps the fan running continuously, providing consistent air circulation․ The “Circulate” function periodically runs the fan to maintain even temperatures throughout the home․
The manual PDF provides clear instructions on how to select and adjust these fan settings․ It explains the benefits of each option and how they impact both comfort and energy consumption․ Understanding these controls, as outlined in the guide, allows for personalized climate management and optimized system performance․
System Mode Selection (Heat, Cool, Auto)
The Honeywell TH5220D1029 thermostat’s system mode selection – Heat, Cool, and Auto – is comprehensively explained within the downloadable installation manual PDF․ These modes dictate how the thermostat controls your HVAC system to achieve desired temperatures․
“Heat” mode activates the heating system when the temperature drops below the setpoint․ “Cool” mode activates the cooling system when the temperature rises above the setpoint․ “Auto” mode intelligently switches between heating and cooling to maintain the programmed temperature, offering convenient year-round comfort․
The manual PDF details how to navigate the thermostat’s interface to select the appropriate mode․ It clarifies the ideal use cases for each setting, ensuring optimal performance and energy efficiency․ Proper understanding, guided by the manual, allows users to tailor the system to their specific climate and preferences․
Troubleshooting Common Issues
The TH5220D1029 installation manual PDF offers solutions for issues like power failures, incorrect readings, and communication errors with your HVAC system․
Thermostat Not Powering On
If your Honeywell TH5220D1029 thermostat fails to power on, the installation manual PDF recommends several troubleshooting steps․ First, verify the power supply at the furnace or HVAC system, ensuring the circuit breaker hasn’t tripped․
Next, carefully check all wiring connections at both the thermostat base and the HVAC unit, referencing the wiring diagram within the manual to confirm correct placement; A loose or incorrectly connected wire is a common cause․
The manual also advises checking the thermostat’s batteries (if applicable, as some models rely solely on power from the HVAC system)․ If the issue persists, consult the manual’s section on system compatibility to ensure the thermostat is correctly matched to your HVAC setup․ A trained technician may be required for complex electrical issues․
Incorrect Temperature Readings
If the Honeywell TH5220D1029 thermostat displays inaccurate temperature readings, the installation manual PDF suggests initial calibration checks․ Verify the thermostat isn’t exposed to direct sunlight, drafts, or heat sources, as these can significantly impact accuracy․
The manual details a calibration procedure allowing you to adjust the displayed temperature to match a known accurate thermometer․ Ensure proper airflow around the thermostat isn’t obstructed by furniture or curtains․
If discrepancies continue, the manual advises checking for proper sensor placement and confirming the thermostat is correctly configured for your home’s heating and cooling system․ A faulty temperature sensor might require replacement; the manual provides guidance on contacting Honeywell support for assistance or locating qualified technicians․
Communication Errors with HVAC System
The TH5220D1029 installation manual PDF addresses communication errors between the thermostat and your HVAC system as a potential issue․ First, verify all wiring connections are secure and correctly matched according to the wiring diagram within the manual․ Loose or incorrect wiring is a common cause of these errors․
The manual recommends checking the HVAC system’s control board for any fault codes or error indicators․ Ensure compatibility between the thermostat and your specific HVAC model; the manual lists compatible systems․
If problems persist, the manual suggests a system reset of both the thermostat and the HVAC unit․ Contacting a qualified HVAC technician is advised if the errors continue, as it may indicate a more complex issue with the system’s control board or communication protocols․
Resources and Support
The TH5220D1029 manual PDF, user guides, and Honeywell’s support contact information are readily available online for assistance and troubleshooting․
Downloading the TH5220D1029 Manual PDF
Accessing the official Honeywell TH5220D1029 installation manual in PDF format is crucial for a successful and safe installation process․ Several online resources offer free access to this document, ensuring you have the necessary guidance at your fingertips․
You can easily locate and download the PDF manual from various websites dedicated to user manuals and HVAC documentation․ These resources typically host multiple versions, potentially including English, French, and Spanish language options․
The PDF contains comprehensive instructions covering everything from wiring diagrams to thermostat configuration and troubleshooting common issues․ Downloading and reviewing this manual before beginning the installation is highly recommended, especially if you are not a trained HVAC technician․ It details safety precautions and verifies product suitability for your specific application․
Ensure the downloaded file is from a reputable source to avoid potentially corrupted or outdated information․ A current manual will reflect the latest updates and revisions for the TH5220D1029 model․
Honeywell Support Contact Information
If you encounter difficulties during the TH5220D1029 thermostat installation, or require clarification beyond the provided PDF manual, Honeywell offers various support channels․ While the manual itself is a primary resource, direct assistance is available for more complex issues․
Honeywell’s official website provides a comprehensive support section, often including FAQs, troubleshooting guides, and contact forms․ You can typically find specific contact details for HVAC products within this section․
For direct assistance, Honeywell offers phone support, allowing you to speak with a trained technician․ Be prepared to provide your thermostat model number (TH5220D1029) and a detailed description of the problem․
Additionally, exploring online HVAC forums and communities can connect you with other users and experienced professionals who may offer helpful advice․ Remember to always prioritize safety and consult a qualified technician for any electrical work or complex installations․
Warranty Information
The Honeywell TH5220D1029 thermostat is typically covered by a limited warranty, protecting against defects in materials and workmanship․ Specific warranty terms and duration can vary, so it’s crucial to review the documentation included with your product or consult the official Honeywell website․
The warranty generally covers repair or replacement of the defective thermostat, but may not cover issues arising from improper installation, misuse, or unauthorized modifications․ Proper installation, following the instructions in the TH5220D1029 installation manual PDF, is essential to maintain warranty validity․
To make a warranty claim, you will likely need to provide proof of purchase, the thermostat model number, and a detailed description of the defect․ Contacting Honeywell’s customer support is the first step in initiating the claim process․
Keep your purchase receipt and warranty information in a safe place for future reference․