

Final Walk-Through Checklist: A Comprehensive Guide
Navigating the closing process? Utilize a final walkthrough checklist PDF to meticulously document property condition, ensuring all agreed-upon repairs are completed before finalizing the purchase.
Understanding the Final Walk-Through
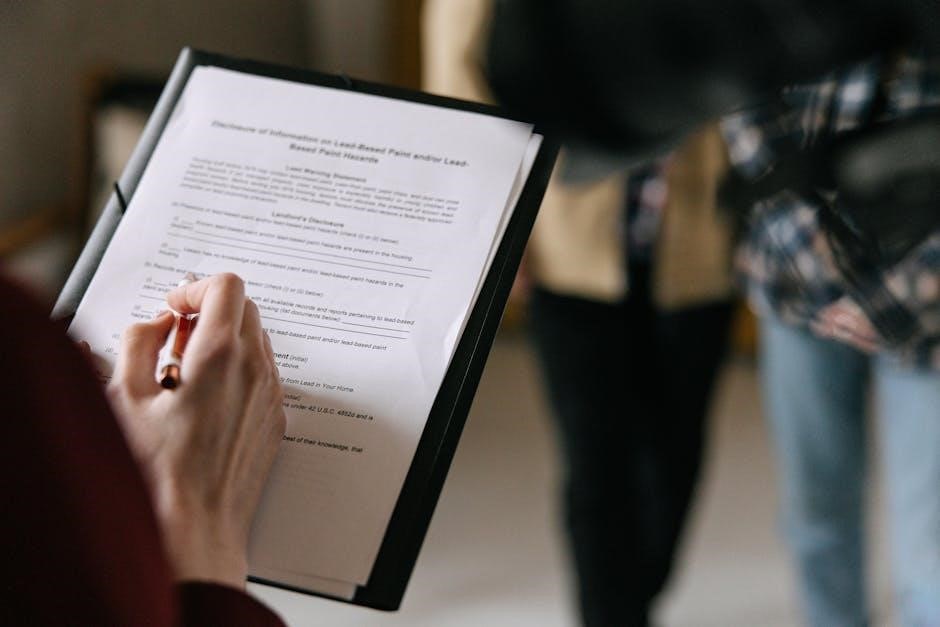
The final walk-through is a crucial step before closing on a property, offering buyers a last chance to verify the home’s condition matches the sales agreement. Utilizing a final walk-through checklist PDF streamlines this process, ensuring nothing is overlooked.
This isn’t a home inspection; it’s a confirmation that previously agreed-upon repairs have been satisfactorily completed and that no new issues have arisen. It’s typically conducted 24-48 hours before closing, allowing time to address any last-minute concerns.
A checklist PDF helps maintain organization, documenting findings with photos or videos. Remember, the goal is to confirm the property is as represented, preventing unwelcome surprises post-closing. It’s a vital safeguard for your investment!
Purpose of the Final Walk-Through
The primary purpose of a final walk-through is to verify the property’s condition aligns with the purchase agreement. Employing a final walk-through checklist PDF ensures a systematic review, confirming all negotiated repairs are completed to a satisfactory standard.
It’s not about discovering new flaws, but about confirming existing issues have been resolved. This protects buyers from inheriting problems they weren’t aware of. A checklist PDF serves as documentation, should disputes arise.
Essentially, it’s a final check to ensure the seller has fulfilled their contractual obligations before the transfer of ownership. A thorough walk-through, guided by a checklist PDF, provides peace of mind and a smooth closing process.
Timing of the Final Walk-Through
Ideally, schedule your final walk-through the day before or the day of closing. This allows time to address any last-minute issues, though resolving them so close to closing can be challenging. Utilizing a final walk-through checklist PDF during this visit ensures nothing is overlooked amidst the excitement.
Avoid scheduling it too far in advance, as the property’s condition could change. Having a checklist PDF readily available streamlines the process, focusing your attention on verifying agreed-upon repairs.
Confirm the property is vacant and accessible. A well-prepared checklist PDF, combined with appropriate timing, empowers buyers to confidently proceed with the closing.
Essential Components of a Final Walk-Through Checklist
A comprehensive final walk-through checklist PDF should cover structural elements, systems, appliances, and repairs, ensuring the property matches the sales agreement.
Structural Elements Inspection
Prioritize a thorough structural assessment using your final walk-through checklist PDF. Carefully examine walls, ceilings, and floors for cracks, water stains, or other damage. Doors and windows must operate smoothly, lock securely, and have intact glass – check for proper sealing.
Inspect the foundation for any visible signs of settling or cracking. Don’t overlook the roof, looking for missing or damaged shingles (if accessible and safe). A detailed final walk-through checklist PDF will guide you through these critical areas, ensuring you document any discrepancies. Remember to verify that any previously identified structural issues have been adequately addressed and repaired to your satisfaction before closing.
Walls, Ceilings, and Floors
Utilize your final walk-through checklist PDF to systematically inspect walls for cracks, holes, or signs of water damage. Pay close attention to paint quality and ensure repairs are neatly finished. Examine ceilings for water stains, sagging, or improper patching.
Floors should be level, free of significant damage, and have securely attached flooring materials. Check for squeaks, loose tiles, or damaged carpeting. Your final walk-through checklist PDF should prompt you to test each room’s flooring. Document any imperfections with photos, noting their location and severity. Confirm that all previously agreed-upon repairs to walls, ceilings, and floors have been completed to a satisfactory standard.
Doors and Windows
Employ your final walk-through checklist PDF to thoroughly assess all doors and windows throughout the property. Ensure doors open and close smoothly, latch securely, and have undamaged frames. Check for proper alignment and any signs of forced entry.
Windows should operate easily, lock correctly, and have intact glass without cracks or breaks. Inspect window screens for tears or damage. Verify that all window and door seals are intact to prevent drafts and water leaks. Your final walk-through checklist PDF should include space to note any issues. Document any discrepancies with photos, and confirm that all agreed-upon repairs or replacements have been satisfactorily addressed before closing.
Systems and Appliances Check
Utilize your final walk-through checklist PDF to systematically verify the functionality of all essential systems and appliances. This includes the HVAC system, plumbing, electrical components, and any included appliances like ovens, dishwashers, and refrigerators.
Confirm the HVAC system heats and cools effectively. Test all plumbing fixtures for leaks and proper drainage. Check electrical outlets and switches, and ensure the electrical panel is safe and labeled. Run each appliance to confirm it operates as expected. Document any issues on your final walk-through checklist PDF, noting the specific problem and requesting resolution before closing. Proof of repair receipts is crucial!
HVAC System Verification
Your final walk-through checklist PDF should dedicate specific attention to the HVAC system. Begin by turning on both the heating and cooling functions, verifying that warm and cool air are distributed throughout the property.
Check the thermostat for accurate temperature control. Listen for any unusual noises emanating from the furnace or air conditioning unit. Inspect air vents for obstructions and proper airflow. If possible, review any recent maintenance records. Document everything on your final walk-through checklist PDF. Any discrepancies or malfunctions must be addressed before closing; request written confirmation of repairs.
Plumbing System Inspection
A thorough plumbing inspection is crucial, and your final walk-through checklist PDF should include detailed steps. Run water in all sinks, tubs, and showers, checking for adequate water pressure and proper drainage. Look for any visible leaks under sinks, around toilets, and near the water heater.
Flush all toilets multiple times to ensure proper function. Inspect exposed pipes for corrosion or damage. Don’t forget to test all faucets for hot and cold water. Document any plumbing issues on your final walk-through checklist PDF and request written confirmation of repairs before closing. Addressing these concerns proactively avoids costly surprises.
Electrical System Check
Your final walk-through checklist PDF must include a comprehensive electrical system check. Test all light switches, including those for ceiling fans and exterior lights. Verify the functionality of all electrical outlets using a simple phone charger or outlet tester. Inspect the electrical panel for any visible damage or signs of overheating.
Ensure all smoke detectors and carbon monoxide detectors are present and functioning correctly – test them! Document any electrical issues, such as flickering lights or non-working outlets, on your final walk-through checklist PDF. Request written confirmation that any identified electrical problems will be resolved before closing to ensure safety and compliance.
Appliance Functionality Test
A thorough final walk-through checklist PDF necessitates testing all included appliances. Run the dishwasher through a complete cycle, checking for leaks and proper drainage. Operate the oven and stovetop, verifying burner functionality and oven temperature accuracy. Test the refrigerator and freezer, ensuring they cool adequately.
If the property includes a washer and dryer, run both through a test cycle. Document any appliance malfunctions or issues on your final walk-through checklist PDF. Confirm that all appliances are free from damage and operate as expected. Any discrepancies should be addressed and resolved before closing, with documentation included in your checklist.
Verification of Repairs and Agreed-Upon Changes
Confirm repairs! A final walk-through checklist PDF helps verify all negotiated fixes are completed to satisfaction, with receipts validating the work performed.
Confirming Completed Repairs
Systematic verification is key. Utilizing a final walk-through checklist PDF ensures a thorough review of all previously requested repairs. Carefully compare the current property condition against the original repair addendum in your purchase agreement.
Document everything! Don’t simply rely on memory; the checklist serves as a tangible record. Specifically, note if each item is fully completed, partially completed, or not completed at all; Request proof of completion – invoices, warranties, or contractor documentation – and attach copies to your checklist PDF.
Address discrepancies immediately. If repairs are unsatisfactory or incomplete, document the issues with photos and videos. Communicate these concerns to your real estate agent promptly to facilitate resolution before closing. A detailed checklist PDF provides a clear audit trail.
Reviewing Documentation of Repairs
Proof is paramount. A comprehensive final walk-through checklist PDF isn’t just about visual inspection; it’s about verifying supporting documentation for all completed repairs. Gather and meticulously review invoices, permits (if applicable), and warranties related to the work performed.
Ensure legitimacy. Confirm the contractor or service provider was properly licensed and insured. Verify the invoice details align with the agreed-upon scope of work and pricing. Digital copies should be scanned and appended to your checklist PDF for easy reference.
Protect your investment. Proper documentation safeguards your interests post-closing. It provides evidence should any issues arise related to the repairs, and is crucial for warranty claims. A well-maintained checklist PDF is your best defense.

Detailed Room-by-Room Inspection
Systematic evaluation is key! A final walk-through checklist PDF guides detailed inspection of each room, ensuring all features and fixtures meet contractual agreements.
Kitchen Inspection Checklist
Focus on functionality and condition! Utilizing a final walk-through checklist PDF for the kitchen ensures a thorough review. Verify all appliances – stove, oven, dishwasher, refrigerator, microwave – are functioning correctly. Inspect cabinets and drawers for proper operation and damage.
Check countertops for scratches or stains, and examine the sink and faucet for leaks. Confirm garbage disposal operation and inspect flooring for damage. Don’t forget to test all kitchen lighting. Ensure any agreed-upon repairs, like cabinet adjustments or appliance replacements, are demonstrably completed. Document everything with photos, referencing the checklist PDF for clarity. A detailed kitchen inspection protects your investment and confirms the property meets expectations.
Bathroom Inspection Checklist
Prioritize plumbing and cleanliness! A final walk-through checklist PDF is crucial for a comprehensive bathroom inspection. Thoroughly test all faucets (hot & cold water), showers, and toilets for leaks or drainage issues. Inspect the caulking around tubs and showers for mold or damage.
Check under sinks for any signs of water damage. Verify proper ventilation with the exhaust fan. Examine mirrors and countertops for cracks or stains. Confirm the functionality of all bathroom lighting and outlets. Ensure any previously agreed-upon repairs, such as toilet replacements or faucet fixes, are completed to satisfaction. Document findings with photos, referencing the checklist PDF for a clear record.
Bedroom Inspection Checklist
Focus on functionality and condition! Employing a final walk-through checklist PDF ensures a detailed bedroom assessment. Verify the operation of all windows and doors, checking for smooth opening/closing and secure locks. Inspect closets for adequate shelving and proper door function.
Test all electrical outlets and light fixtures, including ceiling fans. Look for any signs of water damage on ceilings or walls, indicating potential roof leaks. Check flooring for damage or wear. Confirm any agreed-upon repairs, like painting or carpet replacement, are completed. Document any discrepancies with photos, cross-referencing the checklist PDF for clarity and a comprehensive record of the bedroom’s condition.
Living Area Inspection Checklist
Prioritize a thorough assessment! A final walk-through checklist PDF is crucial for evaluating the living area. Begin by testing all electrical outlets, switches, and light fixtures, ensuring proper functionality. Inspect windows and doors for smooth operation, secure locks, and any signs of damage.
Examine the flooring for wear, stains, or damage, noting any necessary repairs. Check walls and ceilings for cracks, water stains, or other imperfections. Verify the operation of any fireplaces or built-in features. Confirm that all agreed-upon repairs, as documented in the purchase agreement, have been satisfactorily completed. Document everything with photos, referencing the checklist PDF for a clear and organized record.
Final Checks and Documentation
Secure your investment! A final walk-through checklist PDF aids in confirming cleanliness, property condition, and documenting findings with photos/videos for a comprehensive report.
Checking for Cleanliness
Don’t overlook the details! Utilizing a final walk-through checklist PDF, meticulously assess cleanliness throughout the property. Verify all rooms, including kitchens and bathrooms, are free of debris and in a move-in ready state.
Inspect floors for cleanliness – are they swept, vacuumed, or mopped? Check countertops and appliances for lingering residue. Examine windows and mirrors for streaks or smudges. Don’t forget closets and cabinets; ensure they’ve been wiped down.
Document any cleanliness issues on your checklist PDF with photos as evidence. This ensures the seller fulfills their contractual obligation to deliver a clean property before closing, protecting your investment and providing a pleasant initial experience in your new home.
Confirming Property Condition
Protect your investment! A final walk-through checklist PDF is crucial for verifying the property’s condition matches the sales agreement. Systematically inspect structural elements – walls, ceilings, floors – for any new damage.
Confirm previously identified issues have been properly addressed. Test all appliances and systems (HVAC, plumbing, electrical) to ensure functionality. Check doors and windows for smooth operation and secure locking mechanisms.
Document any discrepancies on your checklist PDF, including photographic evidence. This provides leverage for renegotiation or ensures the seller rectifies issues before closing. A thorough condition confirmation safeguards your interests and prevents unwelcome surprises post-purchase.
Documenting Findings with Photos/Videos
Visual evidence is key! Enhance your final walk-through checklist PDF with comprehensive photographic and video documentation. Capture clear images of any defects, incomplete repairs, or discrepancies from the agreed-upon condition.
Video recordings provide a dynamic overview, showcasing issues that photos might miss. Date-stamp all media to establish a clear timeline. This documentation serves as invaluable support if disputes arise post-closing.
Attach these files directly to your checklist PDF or create a separate digital folder linked to the document. Detailed documentation protects your investment and strengthens your position during negotiations, ensuring a smooth and secure property transfer.
Final Walk-Through Report & PDF Template
Streamline your process! A well-structured final walk-through checklist PDF template is essential for a thorough inspection and clear communication. These templates typically include sections for noting property condition, completed repairs, and any outstanding issues.

After completing the walk-through, compile your findings into a formal report, attaching supporting photos and videos. The PDF format ensures easy sharing and archiving.
Utilize readily available online templates or customize one to fit your specific needs. A comprehensive report, built upon a solid checklist PDF, provides a clear record of the property’s condition at closing, safeguarding your interests.

Resources and Professional Assistance
Need help? Download a final walk-through checklist PDF online, or consider hiring a professional inspector for a detailed assessment and peace of mind.
Utilizing Final Walk-Through Checklist Templates
Streamline your final inspection with readily available final walk-through checklist PDF templates! These pre-formatted documents offer a systematic approach, ensuring you don’t overlook crucial details. Many free templates are accessible online, providing sections for structural elements, systems, appliances, and repairs.
Benefits include organized documentation, consistent evaluation, and a clear record of property condition. Templates help buyers verify that the property matches the sales agreement. Look for templates specifically designed for new tenants, property managers, or new construction.
Remember to customize the template to reflect your specific agreement and concerns. Digital PDF forms allow for easy completion and sharing, while printed checklists are useful for on-site note-taking. Utilizing a template empowers you to conduct a thorough and efficient final walk-through.
Considerations for Hiring a Professional Inspector
While a final walk-through checklist PDF is valuable, consider supplementing it with a professional inspection, especially for complex properties or if you lack construction knowledge. A licensed inspector offers an unbiased, expert assessment of the property’s condition, identifying potential issues you might miss.
Schaefer Inspection, for example, provides a 30-minute walk-through appointment with a licensed inspector for a fee. This service can be particularly beneficial for new construction or properties with extensive repairs.
Weigh the cost against the potential savings from uncovering hidden defects. A professional can interpret systems and identify code violations. Ensure the inspector is qualified and provides a detailed report. Combining a checklist with professional expertise offers the most comprehensive final inspection.