
Sure-Jell Cooked Jelly Instructions: A Comprehensive Guide
Sure-Jell simplifies homemade jelly! These directions work with Ball pectin too. Prepare a pectin mixture by slowly stirring one box of SURE.JELL.
Successful jelly relies on precise measurements and proper sterilization. Trial batches help ensure a perfect set, especially when adjusting recipes or using new fruits.
Freezer jam is surprisingly easy, even for beginners, offering a way to preserve the harvest. A freezer effectively pauses time, ideal for capturing seasonal fruit flavors.
Understanding Sure-Jell and Pectin
Sure-Jell isn’t just a brand; it’s a key to unlocking successful, consistently set jellies and jams. At its heart, Sure-Jell contains pectin, the naturally occurring substance vital for gel formation. Understanding pectin is crucial for mastering the art of fruit preservation. Pectin acts as a network, trapping fruit juices and creating that delightful, spreadable texture we associate with homemade jellies.
Historically, achieving a good set relied on fruits naturally high in pectin, like apples and citrus. However, many modern fruits are lower in pectin, necessitating the addition of commercial pectin like Sure-Jell. This ensures reliable results, regardless of the fruit’s inherent pectin levels.
Sure-Jell streamlines the process, offering a convenient and predictable way to create beautiful, flavorful preserves. It’s a cornerstone ingredient for both novice and experienced jam-makers, guaranteeing a delightful outcome with every batch. The product’s consistent formulation removes much of the guesswork involved in traditional pectin extraction methods.
What is Pectin and Why Use It?
Pectin is a naturally occurring structural component found in the cell walls of fruits, particularly apples, citrus fruits, and berries. It’s a complex carbohydrate that, when combined with acid and sugar, forms a gel. This gel is what gives jams and jellies their characteristic texture – that delightful wobble and spreadability we all enjoy.
Why use pectin? While some fruits contain enough natural pectin to set on their own, many modern varieties are lower in it. Adding commercial pectin, like that found in Sure-Jell, guarantees a successful set, especially when working with lower-pectin fruits. It eliminates the uncertainty and potential for runny jams.
Furthermore, pectin helps preserve the fruit’s natural flavor and color. It creates a protective barrier, preventing spoilage and extending the shelf life of your homemade creations. Using pectin allows you to confidently preserve seasonal fruits, enjoying their flavors long after the harvest season ends.
Types of Pectin: Powdered vs. Liquid
Sure-Jell is commonly available in two main forms: powdered and liquid pectin. Powdered pectin, like the “Original Fruit Pectin” from Ball, requires a full boil during the cooking process to activate its gelling properties. This traditional method is often preferred for classic jam and jelly recipes, ensuring a firm set.
Liquid pectin, on the other hand, is added after the mixture has been removed from the heat. It sets more quickly and is ideal for recipes where you want to preserve the fresh fruit flavor and color, as it minimizes prolonged cooking. It’s particularly well-suited for quick jams and fruit spreads.
No-sugar-needed pectins, like some Sure-Jell varieties, are formulated to gel with reduced sugar or artificial sweeteners. These require specific recipes and careful measurement to achieve the desired consistency. Choosing the right pectin depends on your recipe, desired texture, and sugar preferences.
Preparing for Jelly Making
Successful jelly making demands meticulous preparation! Sterilize jars, accurately measure fruit, and have sugar ready. Rinse containers with boiling water for freezer jam.
Crush fruit thoroughly, one layer at a time, for optimal flavor extraction. Precise measurements are key to achieving the perfect gel.
Essential Equipment for Jelly Making

Creating beautiful, homemade jelly requires a few key pieces of equipment. First, you’ll need a large, heavy-bottomed pot – stainless steel is ideal – to prevent scorching during the boiling process. Accurate measuring tools are crucial; utilize liquid measuring cups for liquids and dry measuring cups for dry ingredients like sugar and pectin. A jar lifter is absolutely essential for safely removing hot jars from the boiling water bath, preventing burns and breakage.
You’ll also need canning jars with lids and bands, ensuring they are specifically designed for canning. A wide-mouth funnel helps neatly fill the jars without creating a sticky mess. A non-reactive stirring spoon (avoid aluminum) is necessary for combining ingredients. For testing the jelly’s set, a small plate chilled in the freezer is invaluable. Finally, a ladle is helpful for transferring the hot jelly into the prepared jars. Having these tools readily available streamlines the process and ensures a successful outcome.
Jar Preparation: Sterilization and Safety
Proper jar preparation is paramount for safe and successful jelly making. Sterilization eliminates any microorganisms that could cause spoilage. Wash jars, lids, and bands in hot, soapy water, then rinse thoroughly. Jars can be sterilized by boiling them for 10 minutes in a boiling water bath, or by running them through a dishwasher cycle with a sanitize option.
Lids should be heated in simmering water (not boiling) to soften the sealing compound. Never reuse lids, as the sealing compound is designed for one-time use. Bands can be reused if they are not rusted or damaged. Handle hot jars with care, using a jar lifter to avoid burns. Ensure the rims of the jars are clean and free of chips to guarantee a proper seal. Following these steps minimizes the risk of contamination and ensures your jelly remains safe for consumption.
Fruit Selection and Preparation
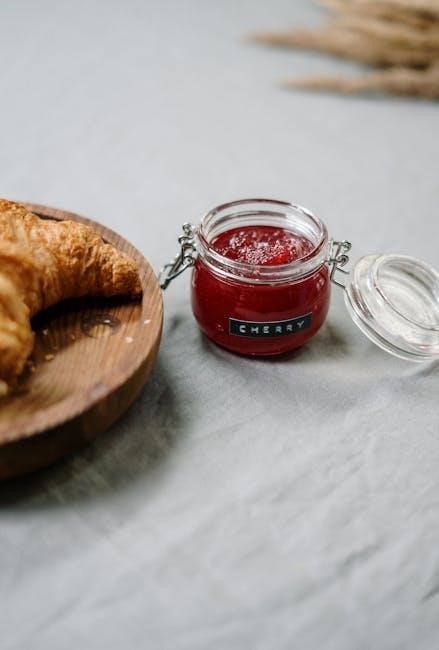
Selecting ripe, high-quality fruit is crucial for flavorful jelly. Berries should be fully ripe, but not overripe or moldy. Peaches should be firm yet yield slightly to pressure. Thoroughly wash the fruit and remove any stems, leaves, or blemishes. Crushing the fruit is often necessary, especially for berries; do this one layer at a time for best results.
Accurate measurement is key – recipes typically specify the amount of prepared fruit. For strawberries, this means crushed fruit. For other fruits, it may involve peeling, coring, and chopping. Measure exactly as directed, as variations can affect the jelly’s set. Some recipes suggest adding a small amount of butter to reduce foaming during cooking. Remember, the quality of your fruit directly impacts the final product, so choose wisely!
The Cooked Jelly Process with Sure-Jell
Combine prepared fruit, Sure-Jell, and water in a large pot. Bring to a full rolling boil, stirring constantly. This vigorous boil is essential for achieving the proper gel.
Measuring Fruit Accurately
Accurate fruit measurement is paramount for successful jelly making with Sure-Jell. Recipes rely on precise fruit-to-pectin ratios to ensure a proper gel. Generally, you’ll need to stem and crush berries, or prepare fruit by chopping and measuring.
The instructions often specify measuring “exactly” a certain amount of prepared fruit – typically 2 cups for a standard batch. This isn’t a casual estimate; use a dry measuring cup and level it off carefully.
For fruits like peaches or raspberries, the text suggests buying approximately 1 ½ pints of fully ripe red raspberries or 1 ¼ pounds of fully ripe peaches to yield 3 ½ cups of prepared fruit.
Remember to measure the fruit after it’s been prepared – crushed, chopped, or otherwise processed as the recipe directs. Consistent measurement is key to predictable results and a beautifully set jelly!
Measuring 5 cups of mashed strawberries is also a common starting point for many recipes.
Combining Fruit, Pectin, and Water
Successfully combining fruit, pectin, and water is a crucial step in the Sure-Jell cooked jelly process. Begin by preparing your measured fruit – crushed berries or chopped fruit – in a large bowl. Recipes often call for adding water, typically ¾ cup, directly to the prepared fruit.
The pectin itself requires careful incorporation. Slowly stir the contents of one box of SURE-JELL fruit pectin into the fruit and water mixture. Stirring slowly prevents clumping and ensures even distribution of the pectin throughout the fruit.
This initial combination creates a base ready for cooking. The goal is to evenly disperse the pectin, allowing it to effectively interact with the fruit’s natural acids and sugars during the boiling process.
Some recipes may also include a small amount of butter, like ¾ teaspoon, added at this stage, potentially to reduce foaming during cooking.
Ensure thorough mixing before proceeding to the boiling stage.
The Boiling Point: Achieving the Gel
Reaching the correct boiling point is paramount for successful jelly setting when using Sure-Jell. After combining fruit, pectin, and water, bring the mixture to a full rolling boil – a boil that doesn’t stop bubbling even when stirred.
Stir constantly during this process to prevent sticking and ensure even heat distribution. Once a full rolling boil is achieved, add the measured sugar all at once. Continue stirring vigorously to dissolve the sugar completely.
Return the mixture to a full rolling boil, and boil hard for exactly one minute. This minute of hard boiling is critical for activating the pectin and creating the gel structure;
Timing is essential; under-boiling may result in a soft set, while over-boiling can hinder gel formation. Remove from heat immediately after the minute is complete to prevent overcooking.
The mixture is now ready for testing to confirm the gel has formed.

Sugar’s Role in Jelly Making
Sugar is vital for gel formation and preservation. Recipes typically call for substantial amounts, impacting flavor and texture. Different sugar types affect the final product.
Precise sugar measurement is crucial for success, and low-sugar options require special pectin formulations.
Sugar Types and Their Impact
Granulated sugar, commonly used in Sure-Jell recipes, provides the necessary sweetness and contributes significantly to the jelly’s gel structure. Its consistent particle size ensures predictable results during the cooking process. However, other sugar types can be explored, each with unique effects.
Cane sugar, derived from sugar cane, offers a slightly different flavor profile compared to beet sugar. While largely interchangeable, some cooks prefer cane sugar for its subtle molasses notes. Brown sugar, containing molasses, is generally not recommended for traditional jelly making as it imparts color and flavor that may mask the fruit’s natural characteristics.
When considering low-sugar or no-sugar options, specialized pectins, like those from Sure-Jell, are essential. These pectins are formulated to gel with reduced sugar levels, often requiring additional ingredients like calcium chloride to compensate for the lack of sugar’s gelling properties. Using regular pectin with reduced sugar will likely result in a soft set or failure to gel altogether. Careful adherence to the specific instructions provided with the low-sugar pectin is paramount for successful results.
Measuring Sugar Correctly
Accurate sugar measurement is absolutely critical for successful jelly making with Sure-Jell. Recipes rely on a precise sugar-to-fruit ratio to achieve the desired gel. The recommended method is to measure sugar by weight using a kitchen scale, ensuring consistency. However, if using volume measurements, it’s vital to employ the correct technique.
Do not scoop sugar directly from the bag; this compacts it, leading to an overabundance. Instead, gently spoon sugar into the measuring cup and level it off with a straight edge. Pre-measuring the 7 cups of sugar into a separate bowl, as suggested in some recipes, is a helpful practice.
Variations in measuring can significantly impact the final product. Too little sugar may result in a weak gel or syrupy consistency, while too much can create a grainy texture. Following the recipe’s instructions precisely, particularly regarding sugar quantity, is essential for achieving a perfectly set and flavorful jelly.
Adjusting Sugar Levels (Low-Sugar Options)
Traditional jelly recipes often call for substantial amounts of sugar, but Sure-Jell offers options for those seeking to reduce sugar content. Utilizing a “no-sugar-needed” pectin, like specific Sure-Jell varieties, allows for significant sugar reduction or even complete elimination.
However, it’s crucial to understand that reducing sugar impacts the jelly’s set and preservation. When using low-sugar pectin, strictly adhere to the manufacturer’s instructions regarding fruit type, pectin quantity, and any necessary acid additions (like lemon juice).
Low-sugar jellies may have a softer set compared to traditional recipes. Proper processing and storage become even more critical to ensure food safety and prevent spoilage. Experimenting with fruit combinations, such as mango and lime with strawberries, can enhance flavor and compensate for reduced sweetness. Always prioritize safety and follow tested recipes when venturing into low-sugar jelly making.
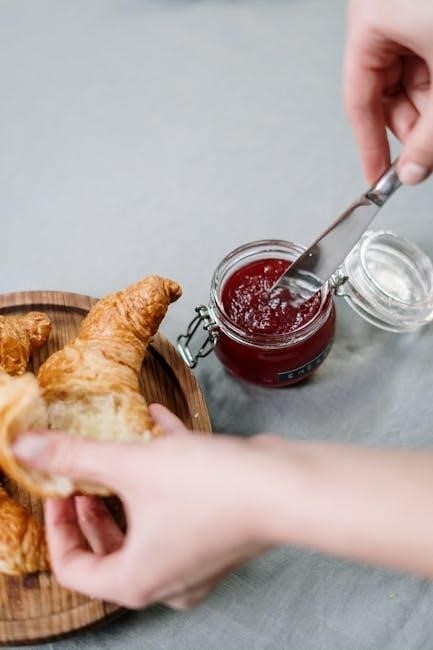
Testing for Jelly Set
Achieving the perfect gel is key! Use the cold plate test, sheet test, or wrinkle test to check for a proper set. A trial batch helps confirm consistency.
These tests determine if enough pectin, acid, and sugar have combined for a firm, yet spreadable, jelly texture.
The Cold Plate Test
The cold plate test is a simple, reliable method for gauging if your jelly has reached the setting point during the cooking process. Before you even begin cooking the jelly mixture, place a small plate in the freezer. This plate needs to be thoroughly chilled – ideally for at least 10-15 minutes.
Once the jelly mixture has reached a rolling boil and you suspect it’s nearing the gel stage, remove the chilled plate from the freezer. Using a spoon, carefully drop a small spoonful of the hot jelly onto the cold plate. Return the plate to the freezer for approximately 30 seconds.
After the brief chilling period, gently push the jelly with your finger. If the surface wrinkles and the jelly doesn’t run back together, it has reached the set! If it remains liquid or watery, continue cooking the jelly for a few more minutes and repeat the test. This method provides a quick visual cue to ensure a perfectly set jelly.
Sheet Test and Wrinkle Test
Alongside the cold plate test, the sheet test and wrinkle test offer additional ways to confirm your jelly’s readiness. For the sheet test, dip a cool metal spoon into the boiling jelly. Lift the spoon and tilt it sideways, allowing the jelly to flow off the side.
If the jelly falls off in a thick “sheet” or two, rather than individual drops, it’s likely set. The wrinkle test is performed similarly. As you tilt the spoon, observe how the jelly leaves it. If the surface wrinkles when you push it gently with your finger, it indicates sufficient pectin development and a proper gel structure.
These tests complement each other and the cold plate test, providing multiple confirmations. Remember, achieving the correct gel point is crucial for a successful, non-runny jelly. Consistent testing throughout the final stages of cooking ensures optimal results.
Processing and Storage
Water bath canning preserves jelly safely. After processing, cool jars and check seals – lids should be concave. Store sealed jars in a cool, dark place for long-term preservation.
Water Bath Canning: A Step-by-Step Guide
Step 1: Place filled jars on a rack inside a large stockpot. Ensure jars don’t touch each other or the sides of the pot. Add enough hot water to cover the jars by at least 1 inch.
Step 2: Bring the water to a rolling boil. Once boiling, start timing the processing according to your recipe and altitude. Processing times vary based on jar size.
Step 3: Maintain a consistent boil throughout the entire processing time. Adjust heat as needed to prevent the water from boiling over or stopping.
Step 4: Carefully remove jars from the canner using a jar lifter. Place them on a towel-lined surface, leaving space between each jar to allow for air circulation.
Step 5: Let the jars cool undisturbed for 12-24 hours. Avoid tightening the lids during cooling. You’ll hear a “pop” sound as the jars seal, indicating a vacuum has formed.
Important Note: Always consult reliable canning resources for specific processing times based on your recipe, jar size, and altitude. Proper canning ensures food safety and long-term preservation.
Cooling and Checking Seals
Cooling Process: After removing jars from the water bath, allow them to cool completely, undisturbed, for 12 to 24 hours on a towel-covered surface. Avoid any movement during this critical phase, as it can interfere with the sealing process.
Listening for the “Pop”: As the jars cool, you should hear a distinct “popping” sound. This indicates that a vacuum seal has formed within the jar, crucial for long-term preservation. Not all jars pop immediately; some may seal later.
Visual Seal Check: After cooling, visually inspect each lid. The center of the lid should be concave (curved downwards) and should not flex when pressed. This confirms a proper seal.
The Ring Test: Remove the canning ring. If the lid remains firmly attached and doesn’t lift, the jar is sealed. If the lid lifts easily, the jar didn’t seal and needs to be refrigerated and used promptly or reprocessed with a new lid.
Storage: Properly sealed jars can be stored in a cool, dark, and dry place for up to a year. Always label jars with the date of processing.
Proper Storage for Long-Term Preservation
Optimal Conditions: For maximizing shelf life, store sealed jelly jars in a cool, dark, and dry location. Exposure to direct sunlight or fluctuating temperatures can compromise the seal and degrade the quality of the jelly.
Temperature Control: A consistent temperature between 50°F and 70°F (10°C and 21°C) is ideal. Avoid storing jars near heat sources like stoves or radiators.
Humidity Considerations: High humidity can encourage mold growth and affect the seal. Ensure the storage area is well-ventilated and relatively dry.
Labeling and Dating: Clearly label each jar with the date of processing. This helps track freshness and ensures you use older jars first. A simple label with the fruit type and date is sufficient.
Shelf Life: Properly stored, sealed jelly can maintain its quality for up to one year. However, best quality is usually within 18 months. Inspect jars before use; discard any with signs of spoilage.